Add your Twitter, Facebook, and other Internet Accounts
Use Internet Accounts preferences to set up your Internet accounts from Google, LinkedIn, Yahoo!, and other providers for multiple Mac apps, such as Mail, Contacts, Calendar, Notes, Reminders, and Messages. To open this pane, choose Apple menu > System Preferences, then click Internet Accounts.
Open Internet Accounts preferences for me
Note: If you haven’t set up an iCloud account and want to do so, use iCloud preferences instead of Internet Accounts preferences. For instructions, see Set up iCloud on your Mac.
If you already set up an iCloud account using iCloud preferences, it appears in Internet Accounts preferences as well. You can also add another iCloud account in Internet Accounts preferences and use it for Mail, Contacts, Calendars, Reminders, and Notes.
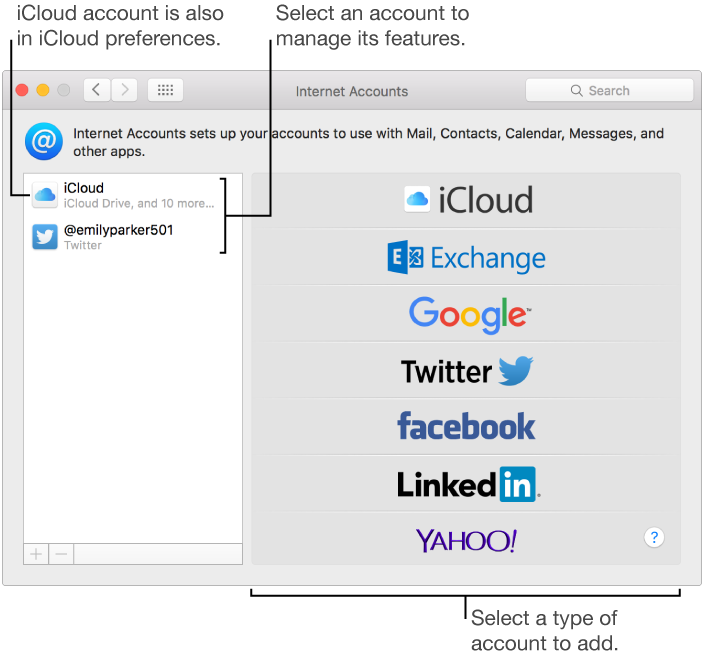
Only the iCloud account shown in iCloud preferences can use iCloud Keychain, iCloud Photos, iCloud Drive, Back to My Mac, Find My Mac, and iCloud Storage for iOS device backups. You need a different Apple ID for each iCloud account.
Add an account
Before you can add an account in Internet Accounts preferences, you must create the account on the provider’s website.
-
Click the Add button
 , then click iCloud, Yahoo!, or another type of account you have.
If you want to add a type of account that isn’t listed, such as your company or school server, click Add Other Account on the right, then select the type of account you want to add. If you don’t know the type of account, ask your network administrator.
Enter your account name, password, and other requested information, then click Set Up.
If the account you added has a list of features on the right, select the ones you want to use.
View account features and details
-
Select an account on the left, then do one of the following:
See account features: Review the selected account’s settings on the right.
Edit account details: For the selected account, click Details on the right. Some accounts display the account name, a description, and other details on the right and don’t have a Details button.
Stop using an account
-
Select the account you want to stop using, then do one of the following:
Remove the account and turn off its features: Click the Remove button
 .
.
Turn off a specific feature: Deselect it.
WARNING: Deleting an account or turning off individual features can remove data stored in your apps. You’re asked whether you want to keep a copy of the data.